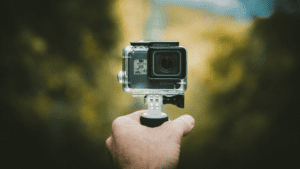
I have been intrigued by the great action photography and videos that are now prevalent online. After a quick look, I found there are several “action” cameras on the market. I opted to go with the mainstream GoPro and quickly realized the photo options, accessories, and camera uses can feel overwhelming.
Assuming I am not the only one who goes through this, I thought I would put together my top ten suggestions to figure this camera out before embarking on a 60-day trail-biking adventure in late summer 2021. I hope this helps if you are on a similar camera journey.
- Still getting through the instructions on the GoPro website. This is a big stretch, as I am not a big “read-the-instructions” kind of person.
- Purchased a book after looking at different videos. Found someone whose advice I could understand from the videos and who happened to have a “how to” book. I initially went with an electronic version, but ended up buying a hard copy as I found it easier for taking notes and as a reference guide.
- Looking at good “how to” videos online. After searching by the camera model (GoPro) and activity (cycling) I wanted to photograph, numerous clips came through. I am finding other people’s experiences and expertise invaluable.
- Reviewed videos of sports I am interested in recording to understand the best way to take shots. For mountain biking, there are typically 3 different options for live shots. Helmet-mounted cameras tend to be too high and “smooth” out the ride, while handlebar mounts are ok but can get crowded with other attachments. My final choice was chest mounted as this gives a better point-of-view and is an extremely popular method with many riders.
- Figuring out key presets for the camera was another challenge. A GoPro can have multiple preset settings for different activities. It’s good to have this in place prior to riding so you can quickly set up. Below is the biking preset example I used based on a few videos I found for trail riding on a bike: Resolution–4k; Frame Fate–24 primary (higher speeds harder to manipulate for slow motion, etc.; this was opposite of my original thinking as I had planned to maximize my frames per second); Field of View–super view (some fuzzy edges, but pulls in the action); Stabilization–auto–lower–hyper smooth at slow; Pro Tune–max iso 1600, sharpness – high, GoPro color; RAW audio on high and Audio–stereo only.
- Purchased a kit with attachments and additional batteries. Found that sports with a lot of noise require use of a soft shell or strips to muffle the wind noise. I purchased a GoPro wind-muffling shell online.
- Learning the swipes to get to all the screens. It is clear I just need to continue to practice to quickly move around the camera.
- Activated voice control–Nice feature since I will want to be relatively hands free while biking.
- Planning VLOG and time sequences, so I purchased a selfie stick with an attachment for my phone and the camera.
- Looking at the capabilities of the new camera. For lots of action, many people advocate buying a Gimble to keep the camera level in action mode. The camera attaches to this mechanism and keeps all the shots level.
So, now it’s off to experiment. This will be the fun part, starting to actively work with the camera and getting used to all the options. I’m counting on the next five months giving me enough time to make a 64-year-old as talented as an under-30-year-old with this new technology. The best part is the video will all be electronic and I don’t have to pay for film processing!
Setting up Your New GoPro